ImageJ
ImageJ is a very useful tool both for real-time astronomical image analysis during acquistion, and for subsequent processing. We use it for measuring exoplanet transit light curves as well as for producing color images from science images taken at the observatories.
More information about AstroImageJ, our version of ImageJ specifically for astronomical image acquisition and analysis, is available from our software website:
Color Composite from Separate Red, Green, and Blue Images
ImageJ may be used to make an RGB color composite from separate science images. The process begins by loading three images in order red, green, and blue:
- File -> Open -> red.fits "R" is red
- File -> Open -> green.fits "V" is the astronomer's visual or green
- File -> Open -> blue.fits "B" is blue
The order determines which file becomes which color.
Next make a color composite image so that we can see the colors.
Image -> Color -> Make composite
You'll see the color composite of all three on the screen. Each layer has its full range of data, but what you see is limited by the screen's display to a range from to 255 values.
You should also see a "Channels Tool" on the screen that will allow you to turn off the effects of one or more layers. For now, keep them all on. Use the bottom slider to be sure you have the first layer selected.
Use
Image -> Adjust -> Window/Level -> Set
and you can adjust the range and color balance for each layer of the image.
When the result is satisfactory you may save the work in progress as a tif file, or save the final result for web use and display as a jpg file with
File -> Save as -> jpg
How to Process Planetary Video Images
We use a Prosilica GX-3300 camera that takes hundreds of 6 megapixel 16-bit frames in a few seconds. ImageJ can sort the frames, find the best images, perform some enhancement, and produce a final image similar to what is done with Registax in Windows. In order to do this easily there are ImageJ should have the Stack Sorter, Image Stabilizer, and Select Frames with Best Edges plugins. These are included in AstroImagej, or may be found from links on ImageJ website.
All of the 16-bit RGB tif image files from one set of camera exposures should be in a single directory. Use ImageJ import to load these files as a single stack:
Import -> source directory
You will have 3 times as many slices are there were images since each R, G, and B layer of the image will go to its own slice.
If the planet does not fill the image frame, then crop the image to a managable size. The stabilizing and sorting routines are much faster on smaller frames. After cropping, run
Plugins -> Stacks -> Image Stabilizer
with the stack preset to the first frame. Image Stabilizer uses the displayed frame as the reference. In some cases it takes multiple passes to stablize the images, and it may help to rerun the plugin with different initial frames.
After stabilization, convert the frames to a hyperstack. This associates each of the layers with its own image in the stack.
Image -> Hyperstacks -> Stack to Hyperstack
Now there will be two sliders under the image. The upper one selects the RGB channel, and the lower one selects the slice.
Split each of the channels into its own stack with
Image -> Color -> Split Channels
On each channel run the quality selection independently with
Plugins -> Stacks -> Select Frames with Best Edges
You will have a default choice of finding the frames that are better than 95% of the images in the stack. Typically we adjust this so that 10 to 20 out of 100 original images are retained.
On each of of the best image stacks, use
Plugins -> Stacks -> Stack Sorter
to remove any frames that are noticeably poor.
When the selection is satisfactory, use
Image -> Stacks -> Z Project -> Average
and create a single image that is the average of the best ones. "Average" works well when the original images are 16-bits, but with 8-bit images "Sum" may be better since it will yield a 16-bit image. The difference is in image normalization and it affects the final color balance, but that may be handled when the three colors are combined again.
Repeat this for each R, G, and B image stack, and then save the average best images as intermediate tif files. It is helpful to name the files with the color associated with that stack.
With that, you can load the files back in order red, green, and blue, and then create a color composite image. Finally, the composite image may be processed to achieve the preferred color balance, and to accentuate detail. For example,
Process -> Filters -> Unsharp Mask
with 1 or 2 pixels will lightly enhance fine detail. A filter such as this may be run interatively to achieve the desired result.
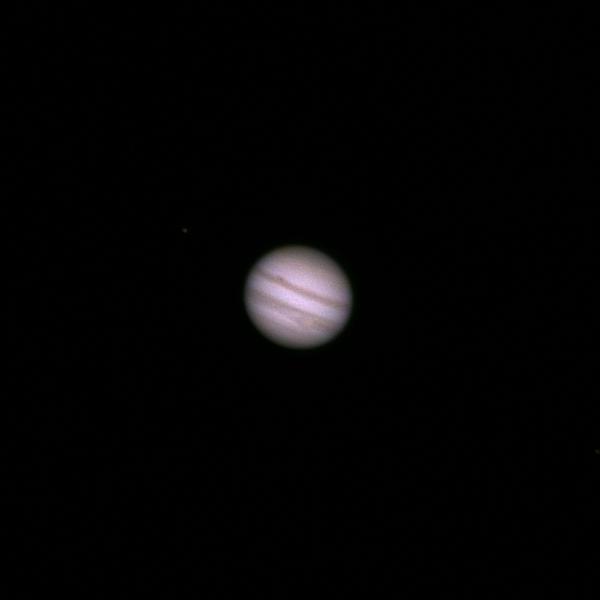
This is an example from the CDK125 telescope and the Prosilica GX-3300 camera taken on Jupiter29, 2011, at 00:31 EDT.
